GraphQL teams often struggle to test schema changes in a federated API without disrupting live traffic. This guide shows how to use WunderGraph and Signadot Sandboxes together to create isolated environments, allowing you to safely validate schema updates and new subgraphs before they affect your main API.
One of the common challenges when working with GraphQL is managing schema evolution, especially testing changes introduced in a subgraph of a federated API (e.g in a git branch) without disrupting the GraphQL API deployed in a shared environment like staging.
This document presents an approach to address that challenge by combining WunderGraph with Signadot Sandboxes, enabling you to validate schema updates in an isolated environment while preserving baseline reliability.
Before we explore how to integrate Sandboxes with WunderGraph, let’s define the baseline environment.
We’ll follow the setup described in the WunderGraph Cosmo Cloud Onboarding guide, but adapt it to run on Kubernetes (using a local minikube cluster for this demo).
Prerequisites:
kubectl and minikube installedwgc CLI installed and authenticatedsignadot CLI installed and authenticatedRun the following commands to prepare your environment:
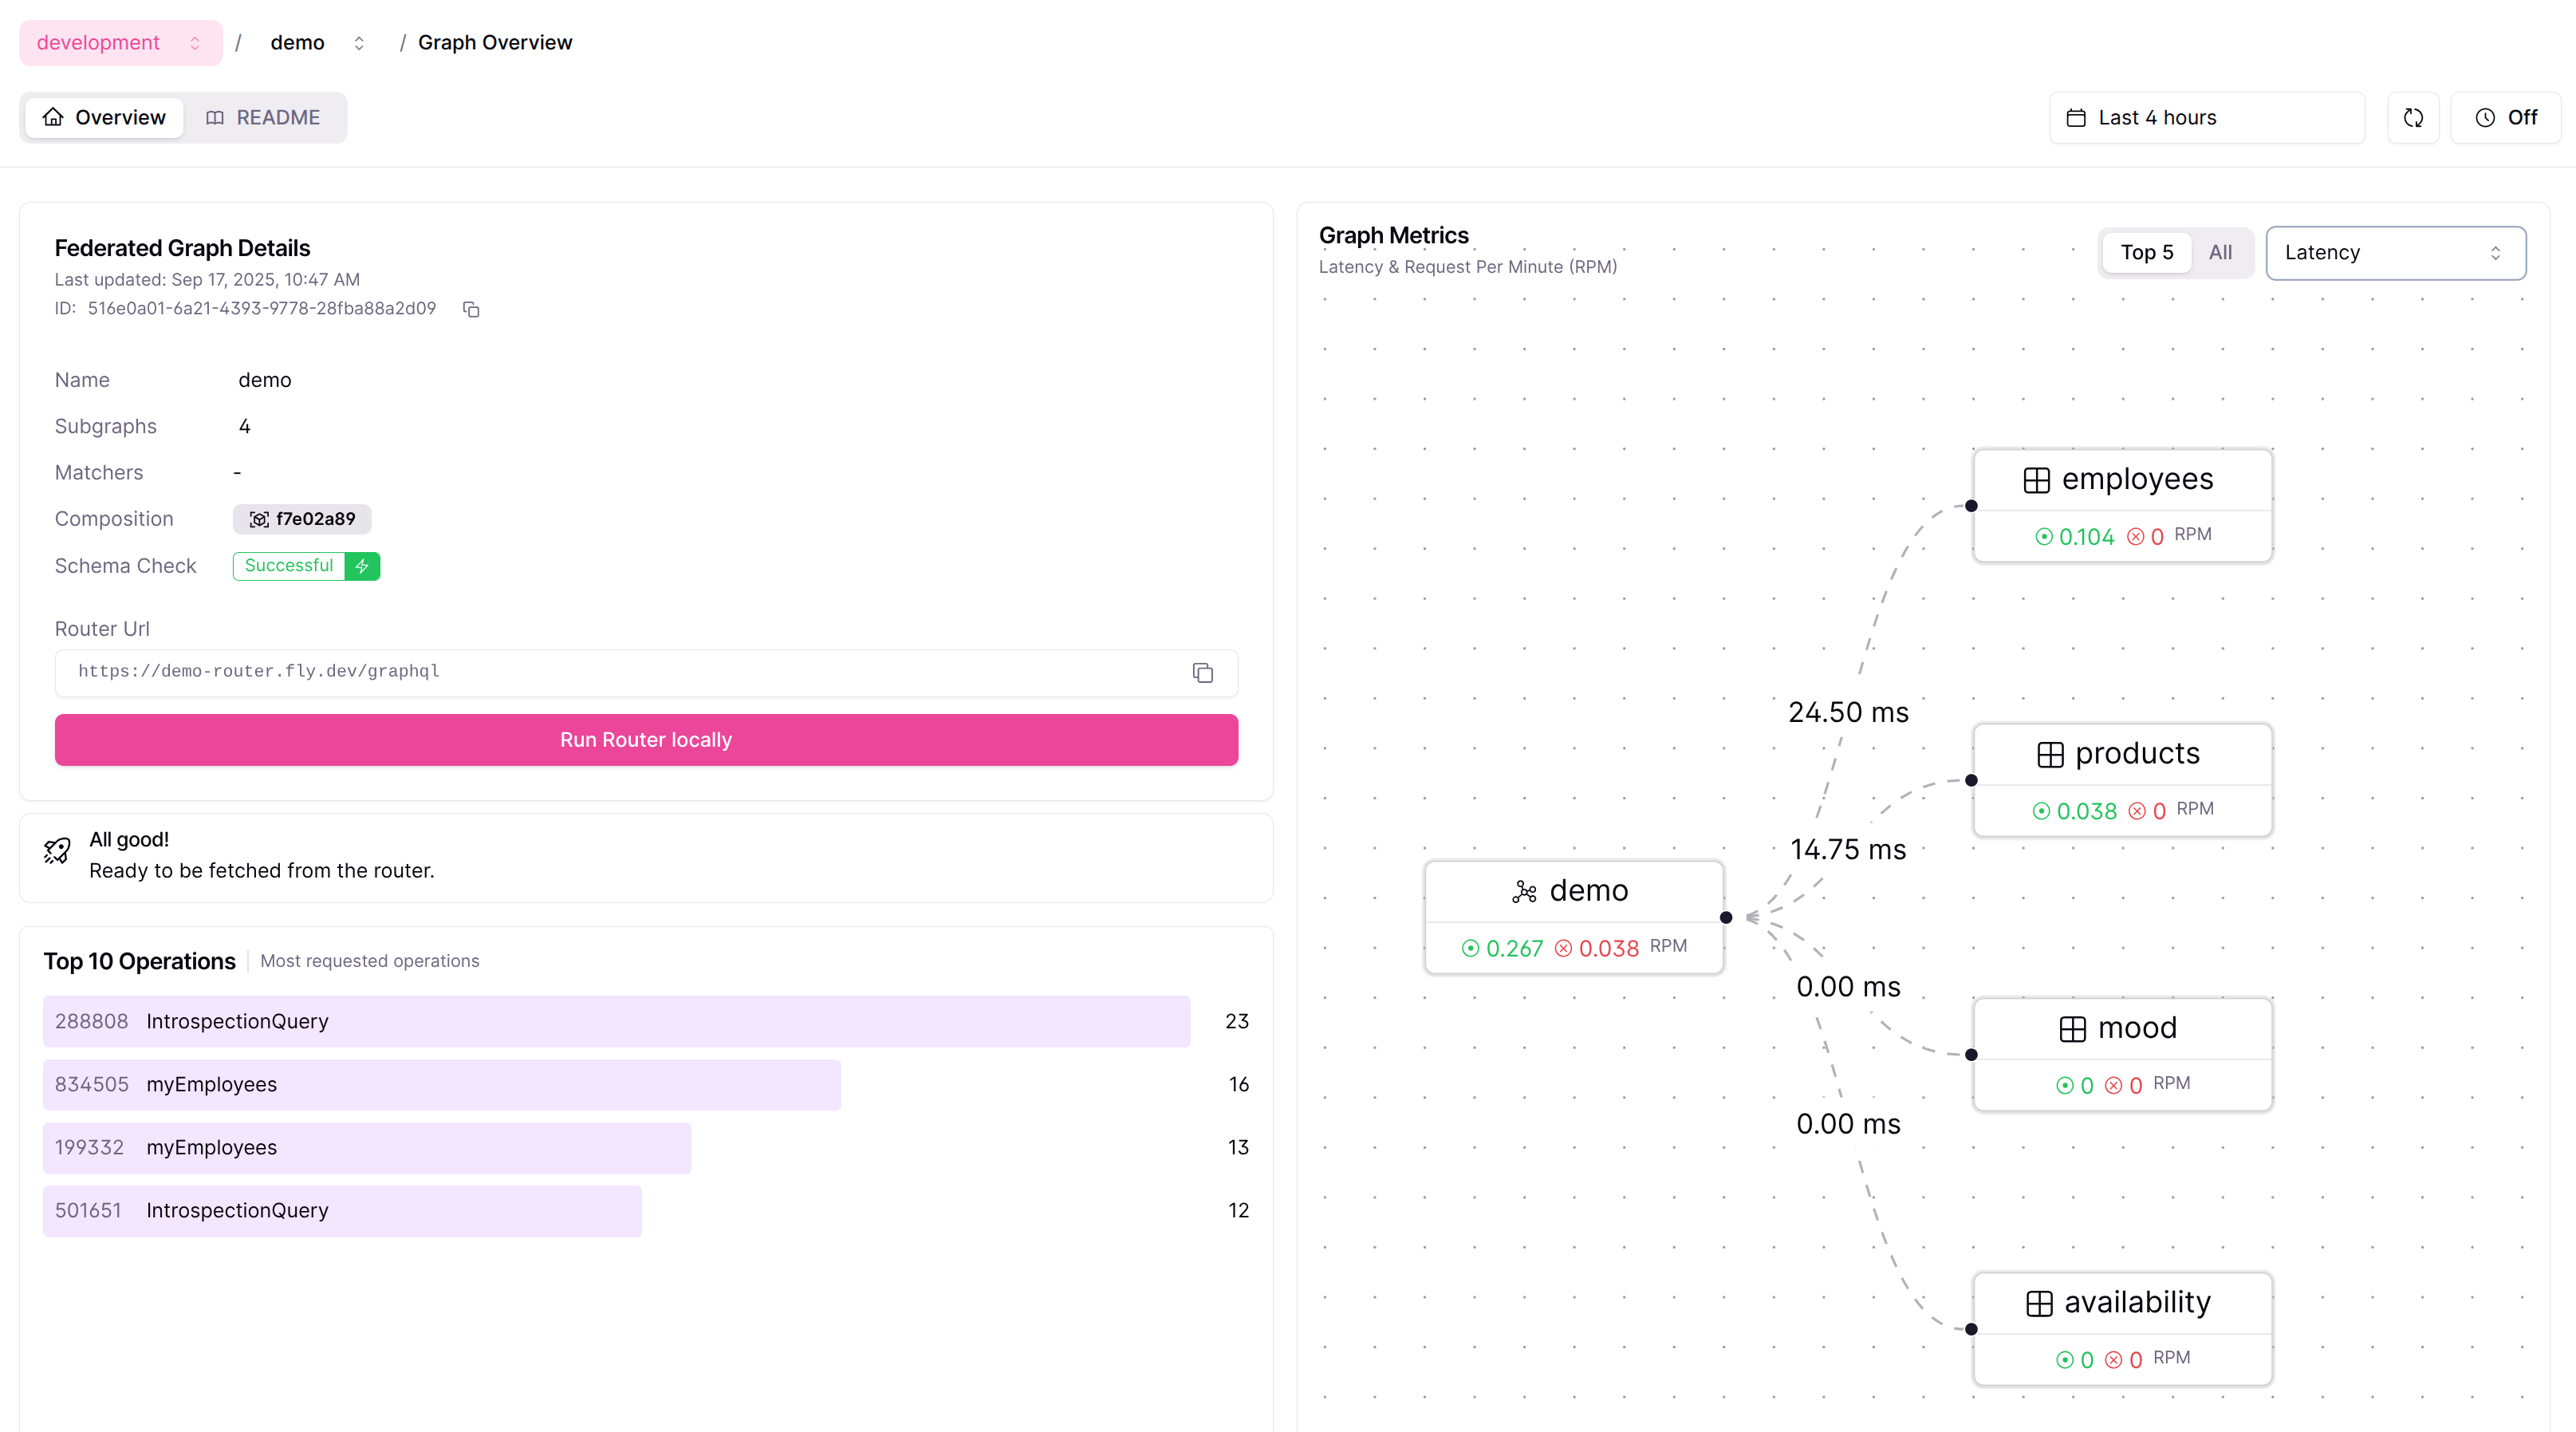
At this point, your federated graph should be active and visible in the WunderGraph Cosmo Console. You can open the console to verify that all subgraphs have been registered and the router is healthy.
You can also explore the router’s GraphQL playground locally using Signadot:
1. Start the local connection:
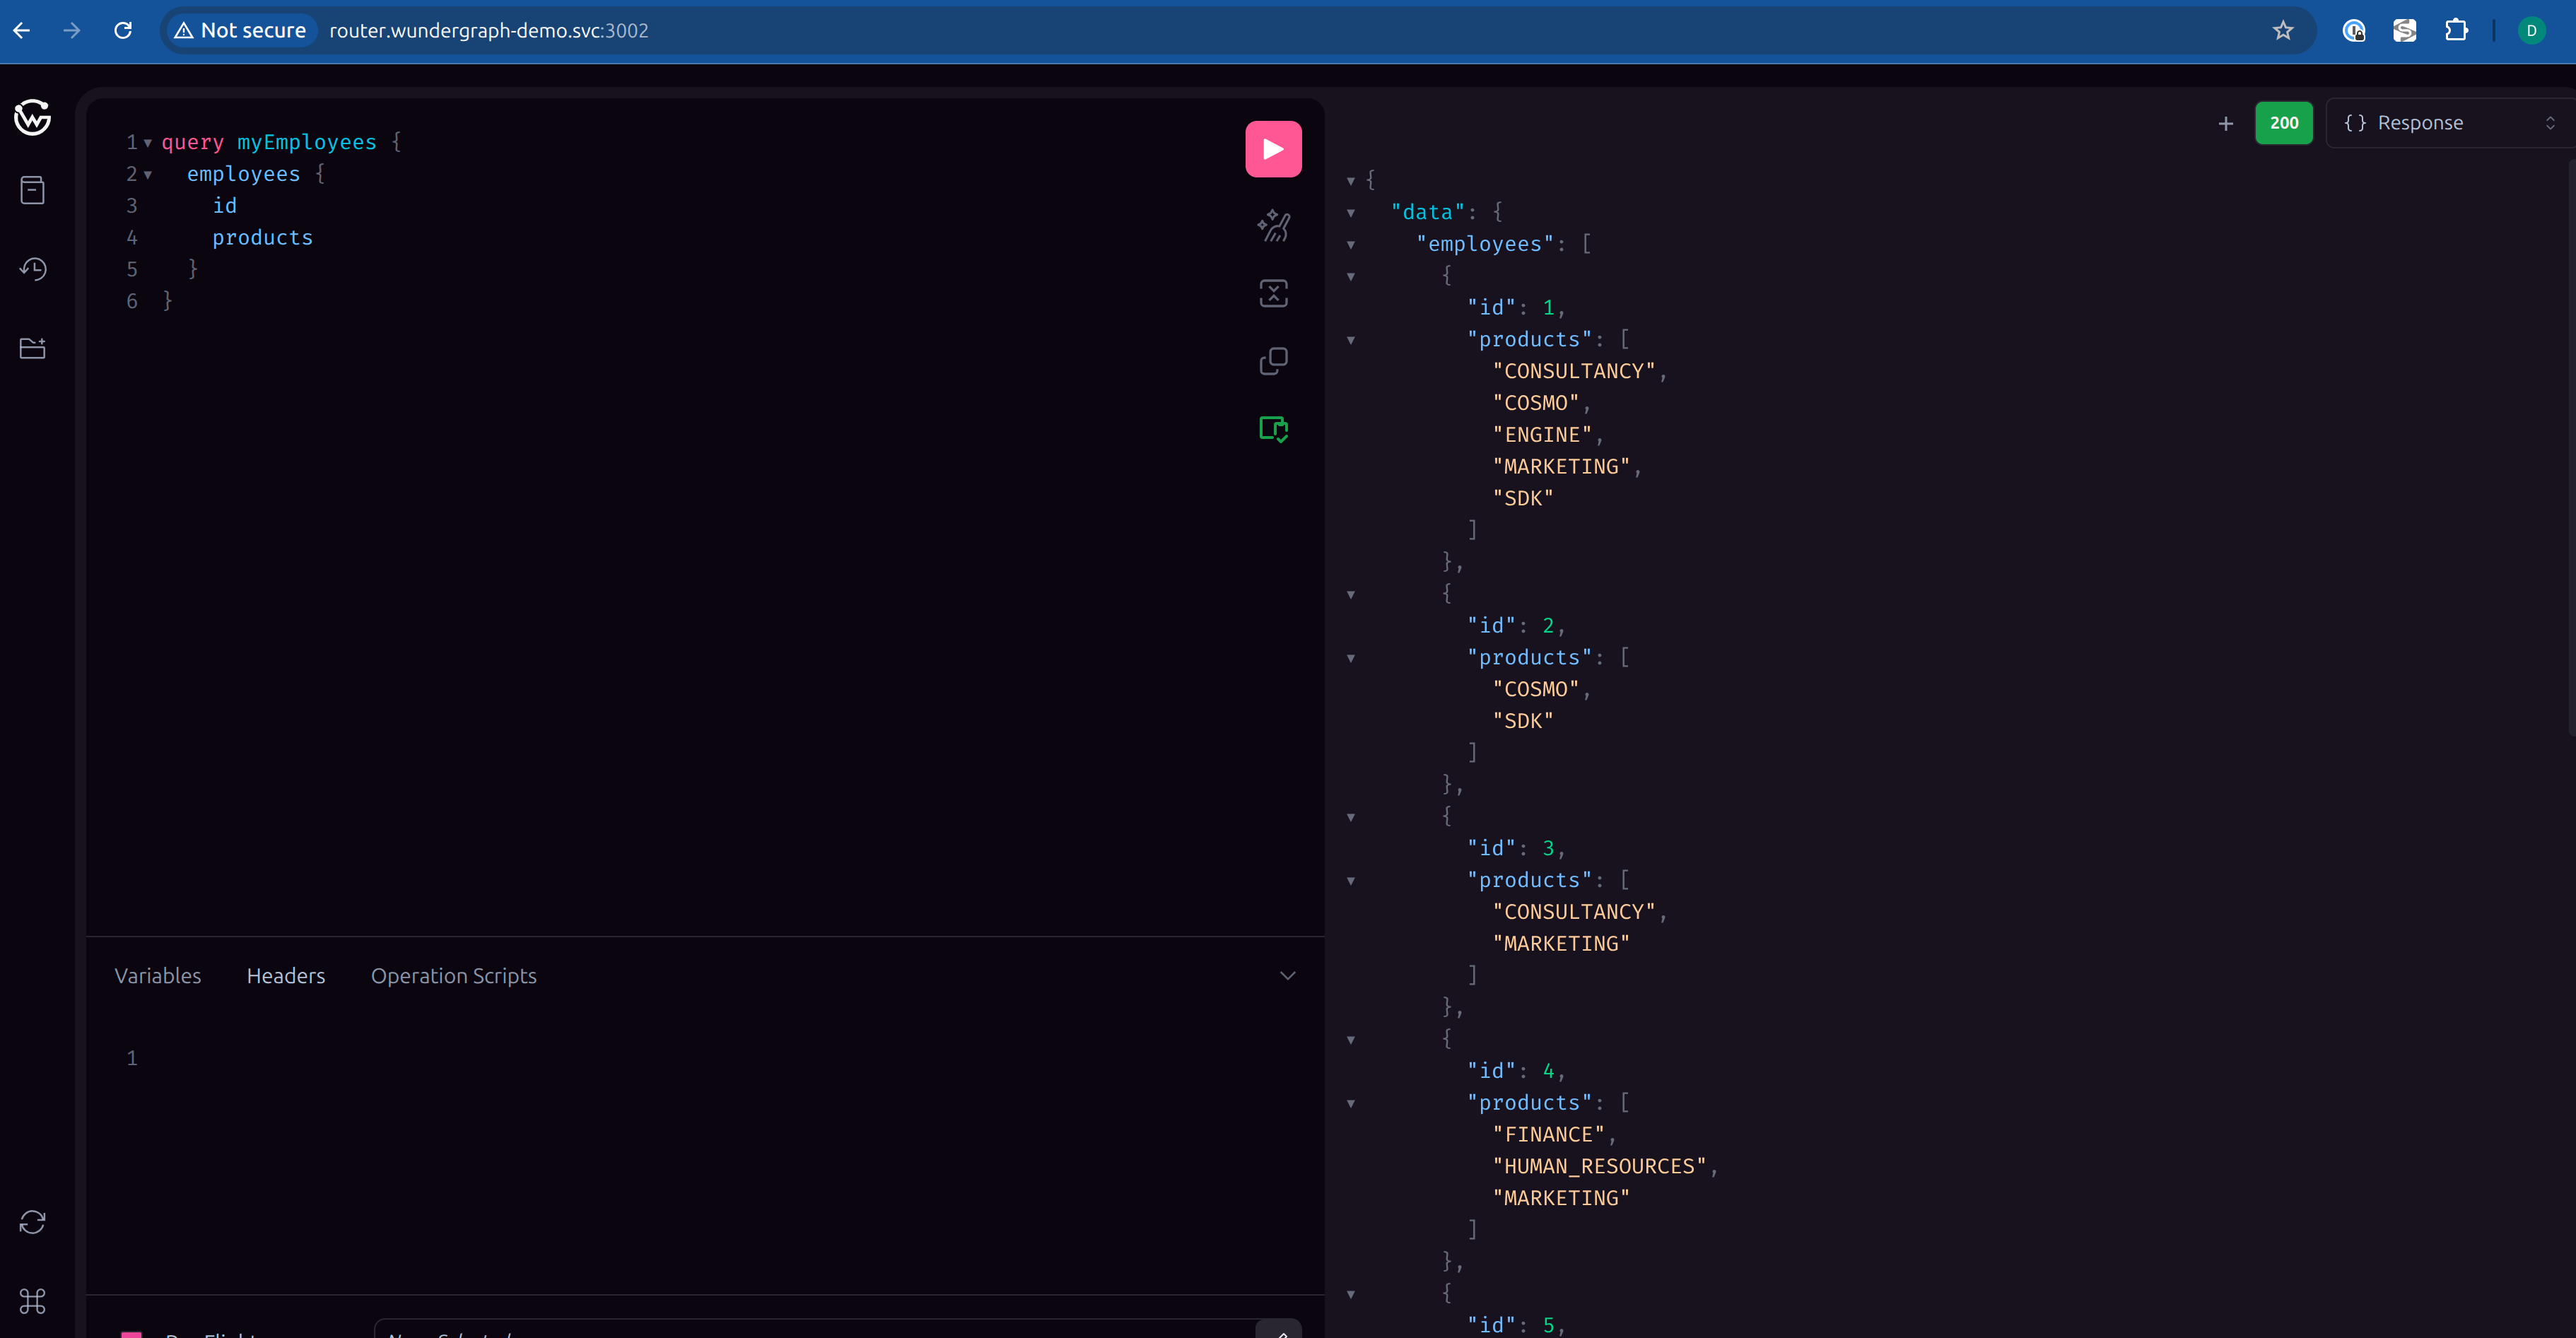
2. Open the router playground in your browser:
http://router.wundergraph-demo.svc:3002/
3. Paste the following GraphQL query into the editor:
To achieve our goal of introducing schema changes without impacting the baseline environment, we’ll leverage WunderGraph’s Feature Flags capability.
Here’s how it all fits together:
1. Create a fork of the products service using the products_fg image (an alternative version of the products service where some schema updates were introduced).
2. Using the resulting sandbox routing key from above (referred to as
You can generalize the procedure above for multiple services as follows:
These two steps can easily be automated in a CI pipeline: first detect the services that have changed, then create the sandbox, and finally configure and register the feature flag once everything is ready.
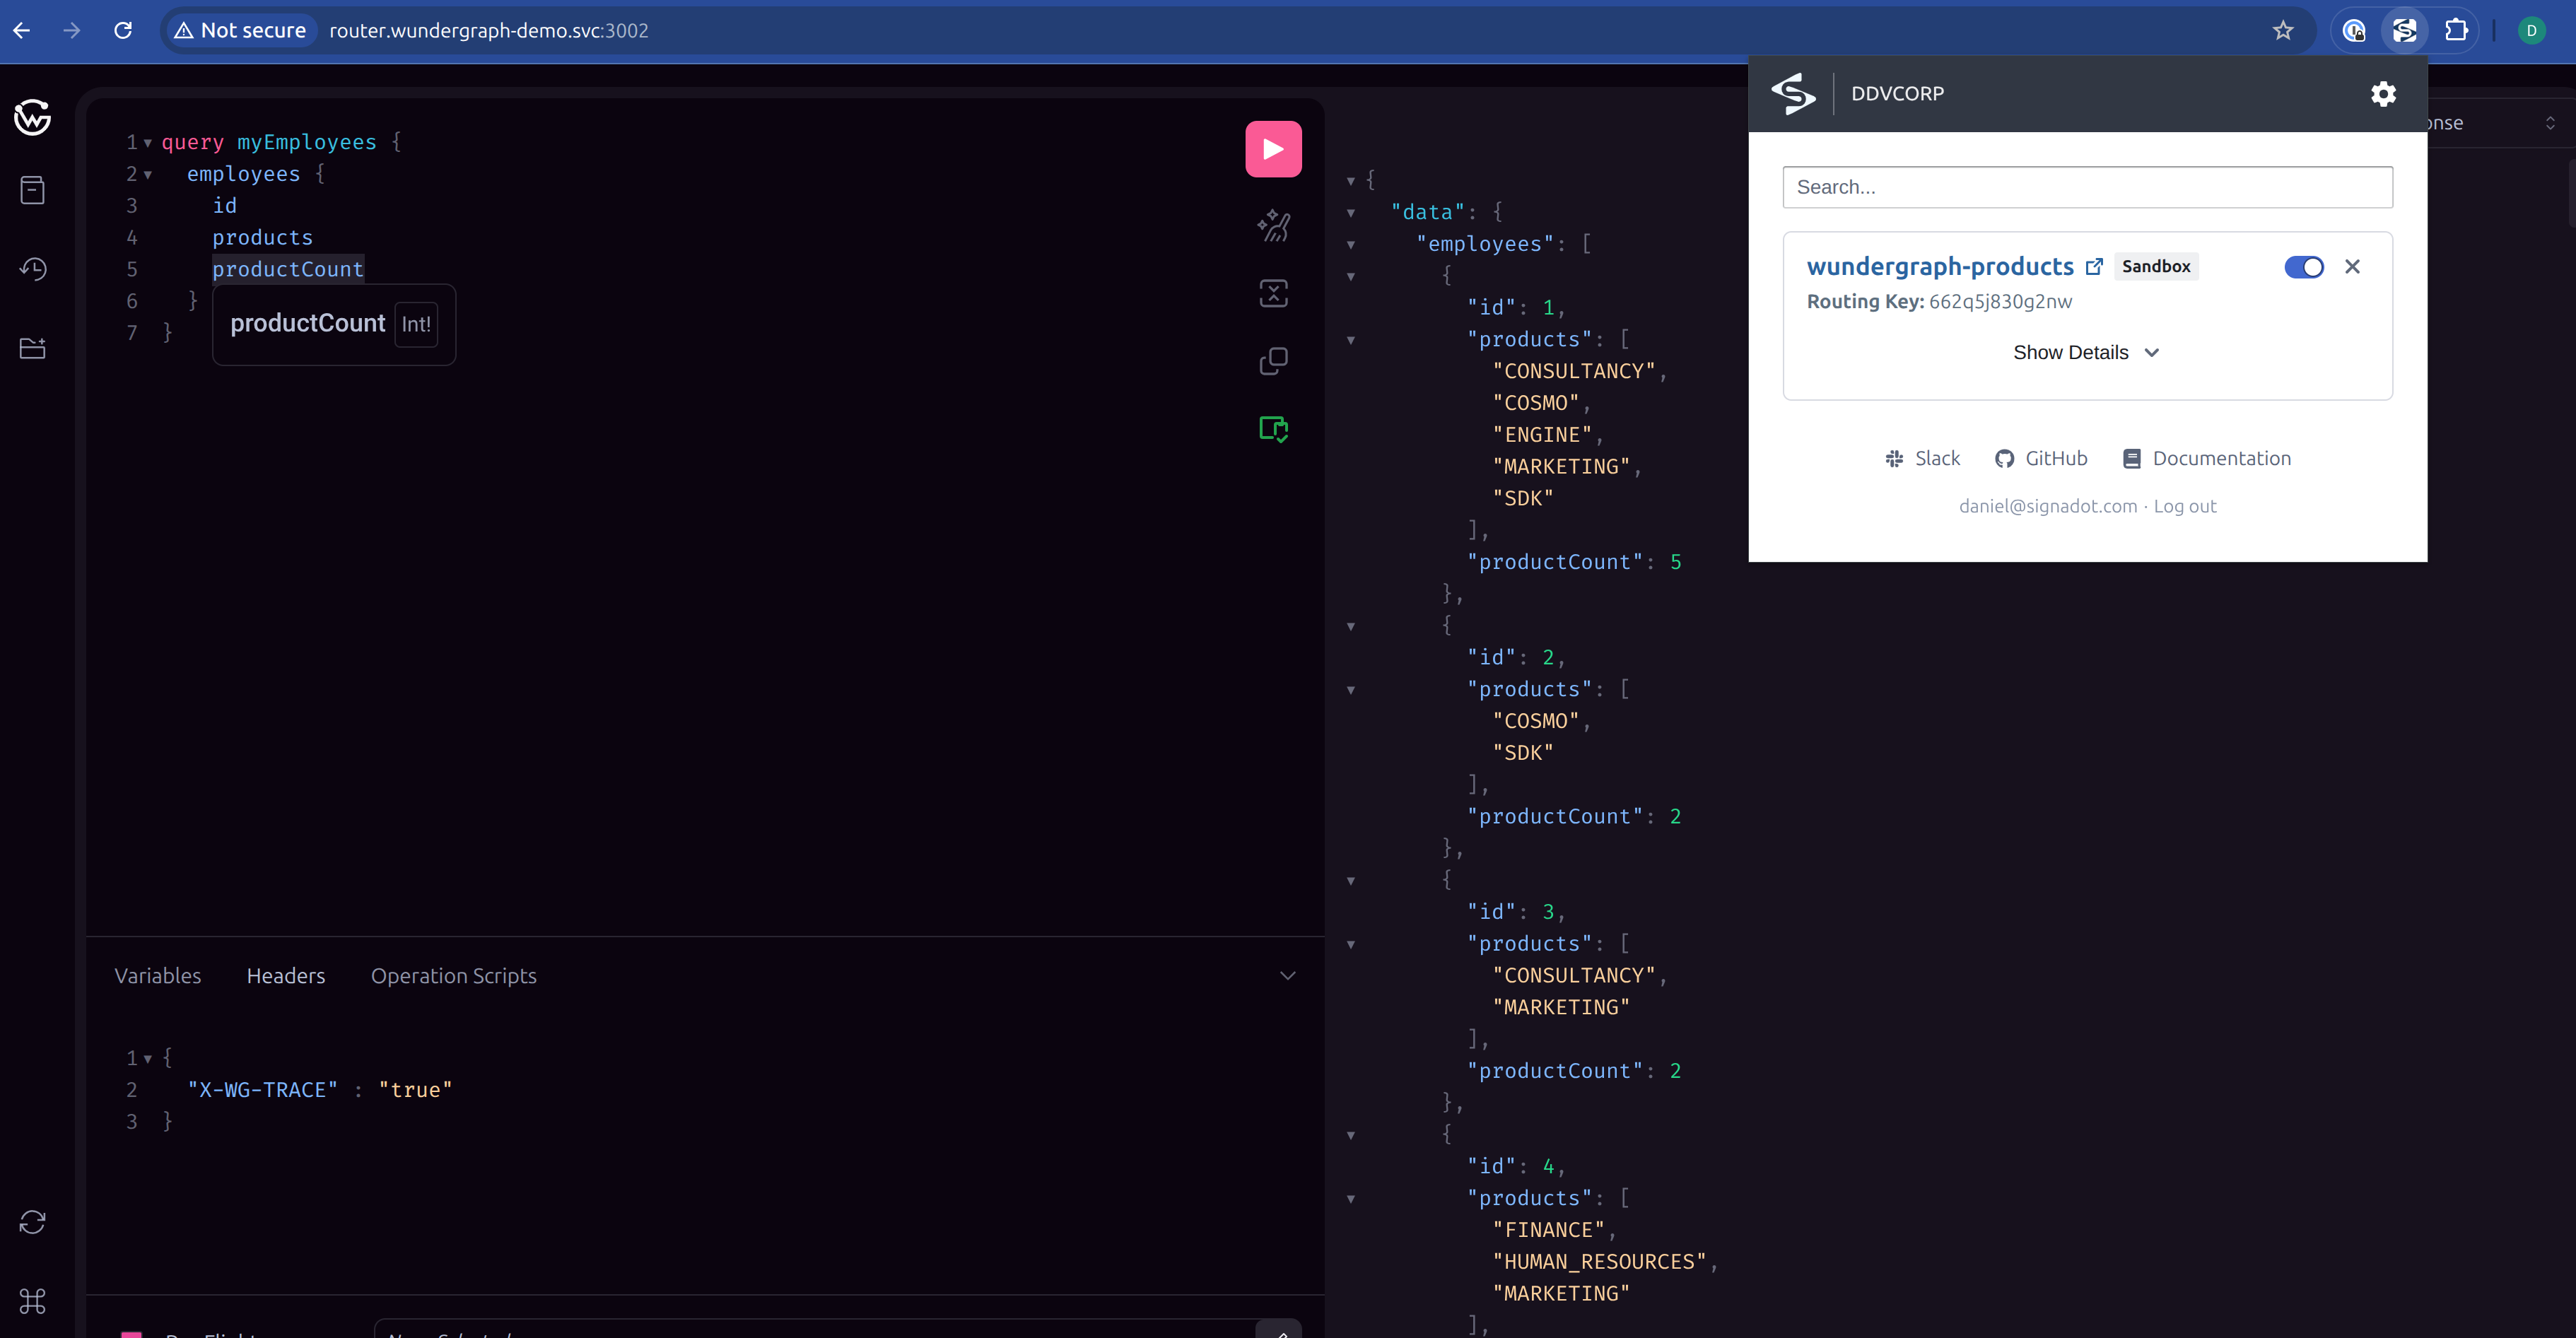
If you open the router playground again, this time under the context of the sandbox you created (in this demo we are using the browser extension to do so), you’ll notice a new property available on the employee type: the productCount field, which is served by the products_fg fork.
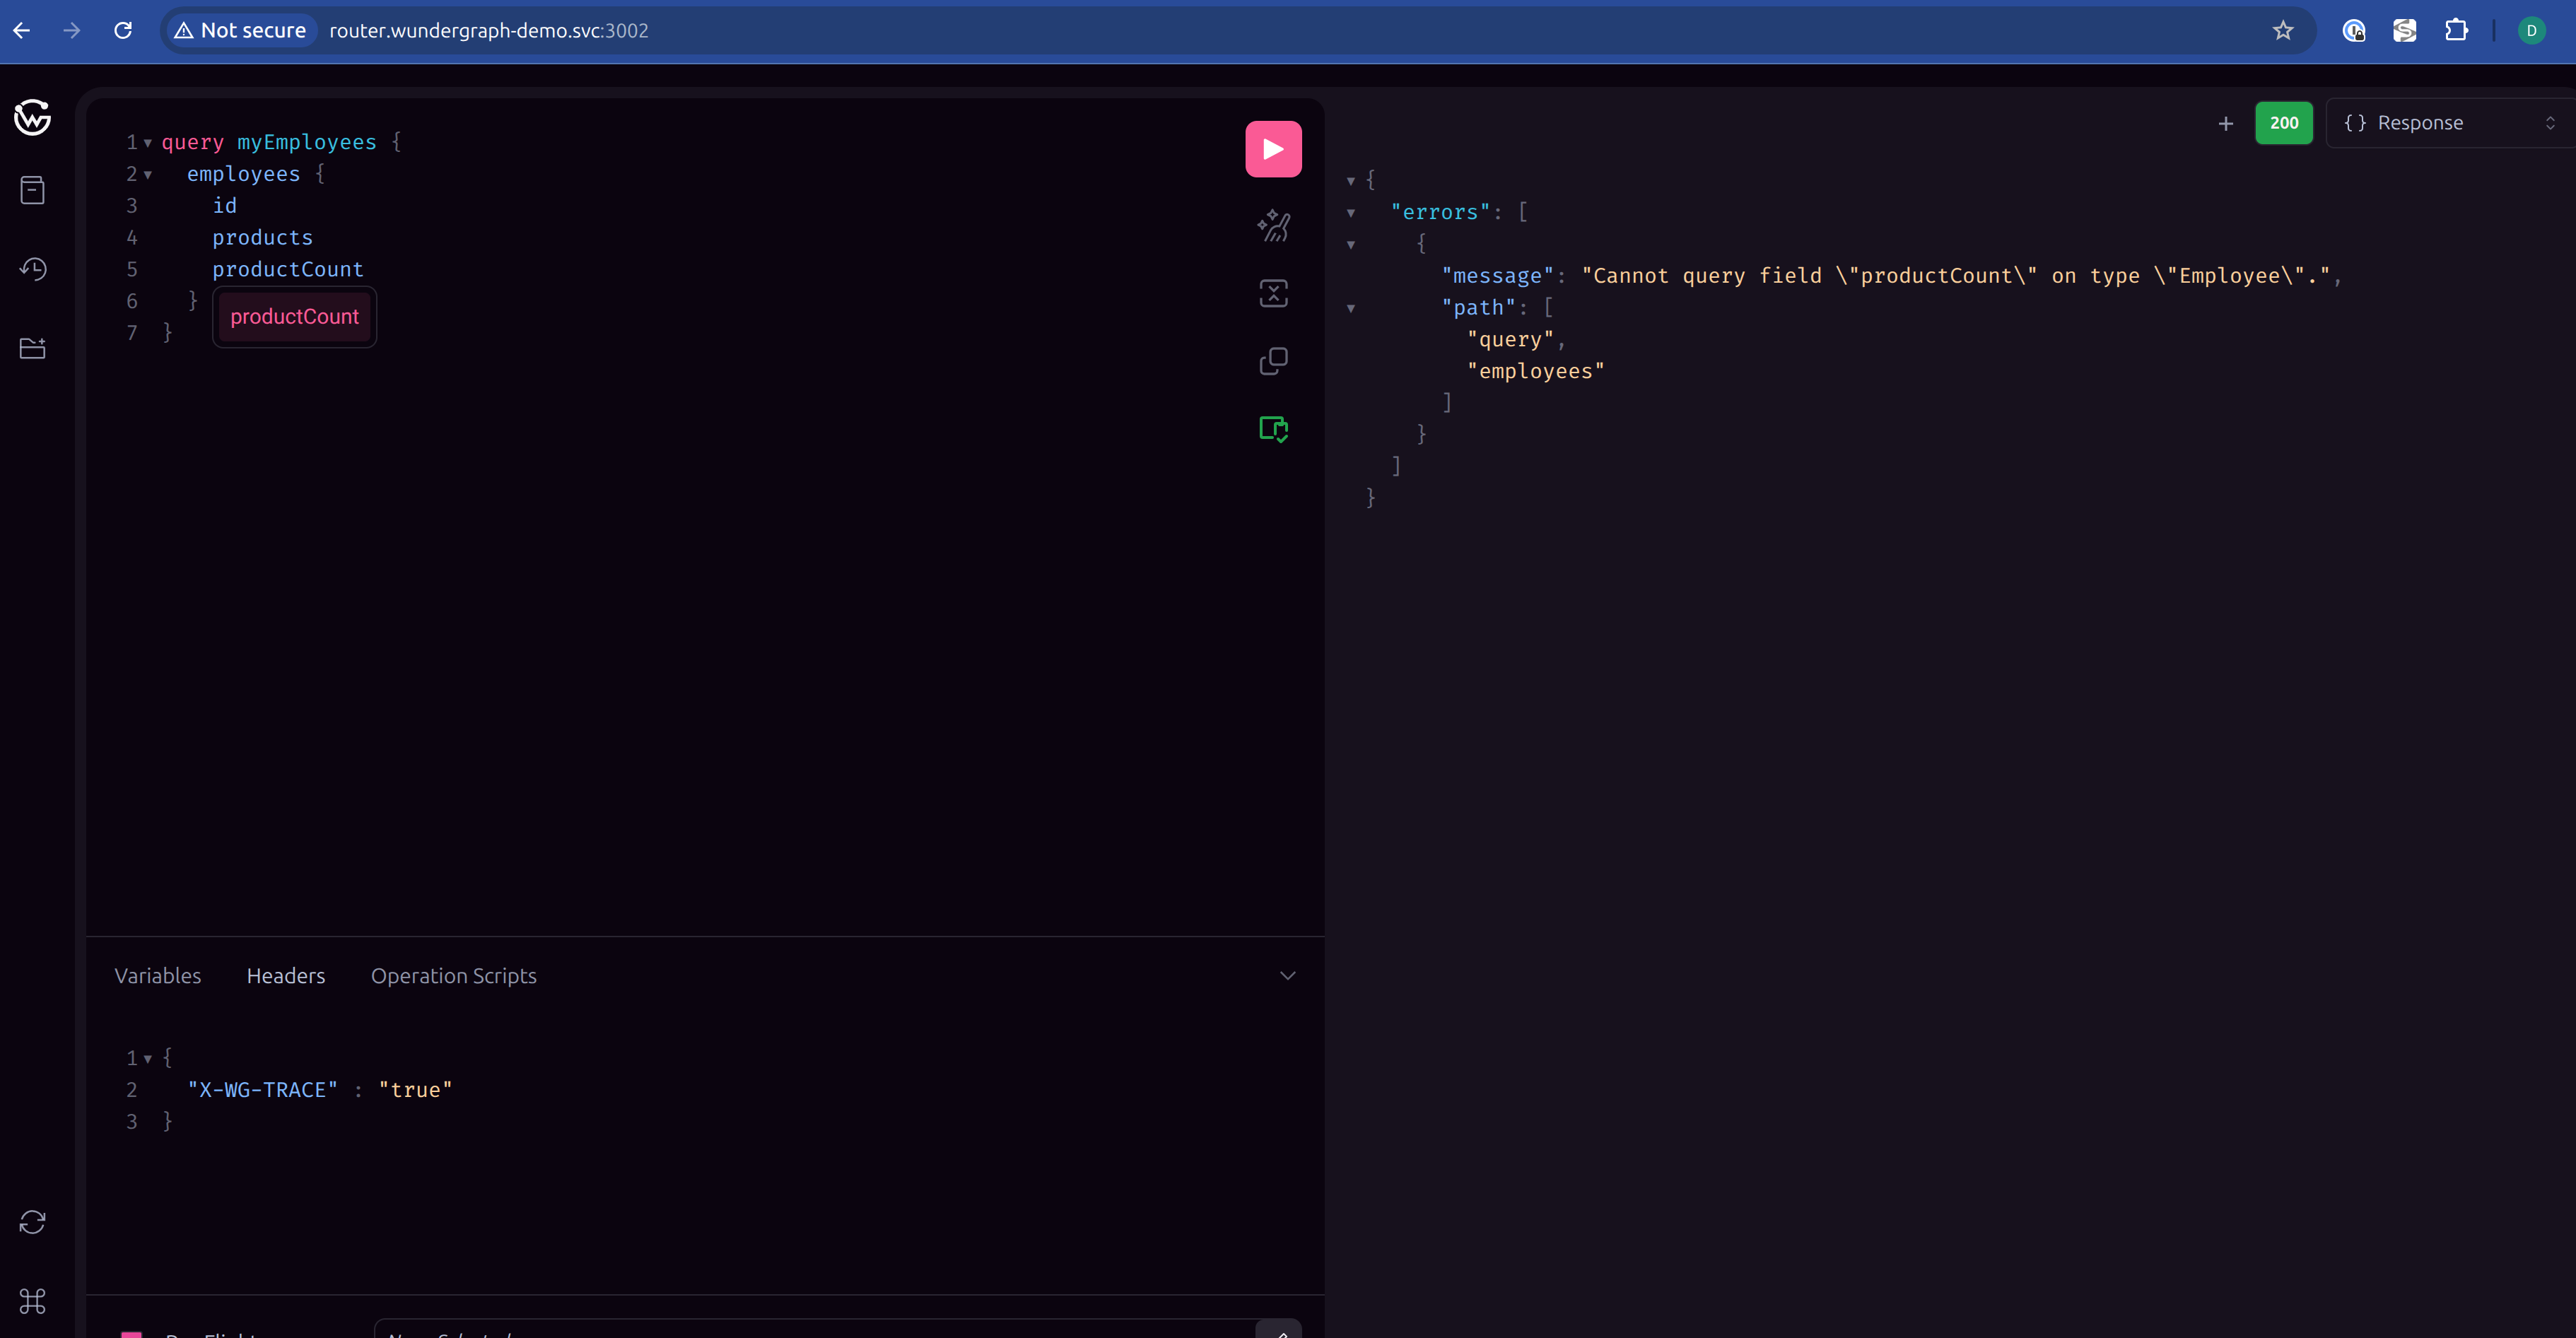
If you run the same query against the baseline environment, you’ll receive an error because the productCount field isn’t implemented there.
WunderGraph’s feature flags operate via the X-Feature-Flag header.
Because the Signadot routing key is typically propagated through standard context propagation mechanisms, such as W3C Trace Context and Baggage, we needed a way to convert it into the appropriate feature-flag header.
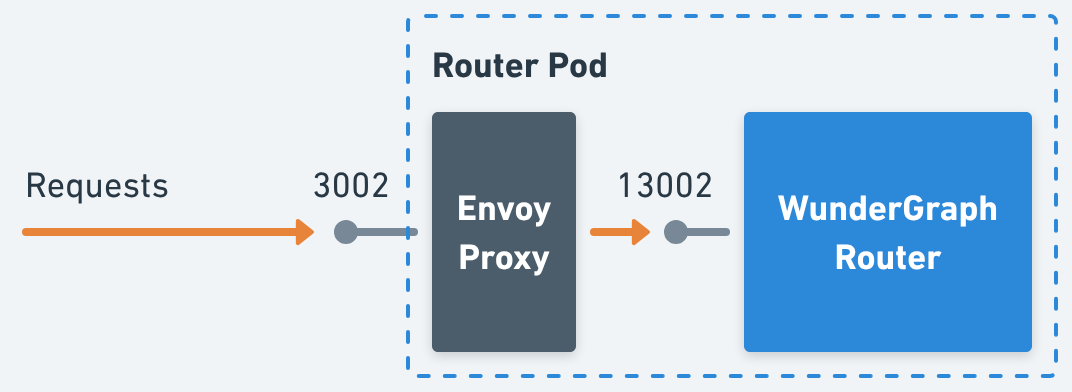
To achieve this, we added a proxy in front of the WunderGraph Router within the deployment.
This proxy intercepts requests, extracts the routing key, translates it into the X-Feature-Flag header, and then forwards the request to the actual Router.
For example, if an incoming request includes the following header:
After passing through the proxy, the request will look like this:
The proxy simply extracts the sd-routing-key value from the Baggage header and adds it as an X-Feature-Flag header, leaving the original Baggage header untouched.
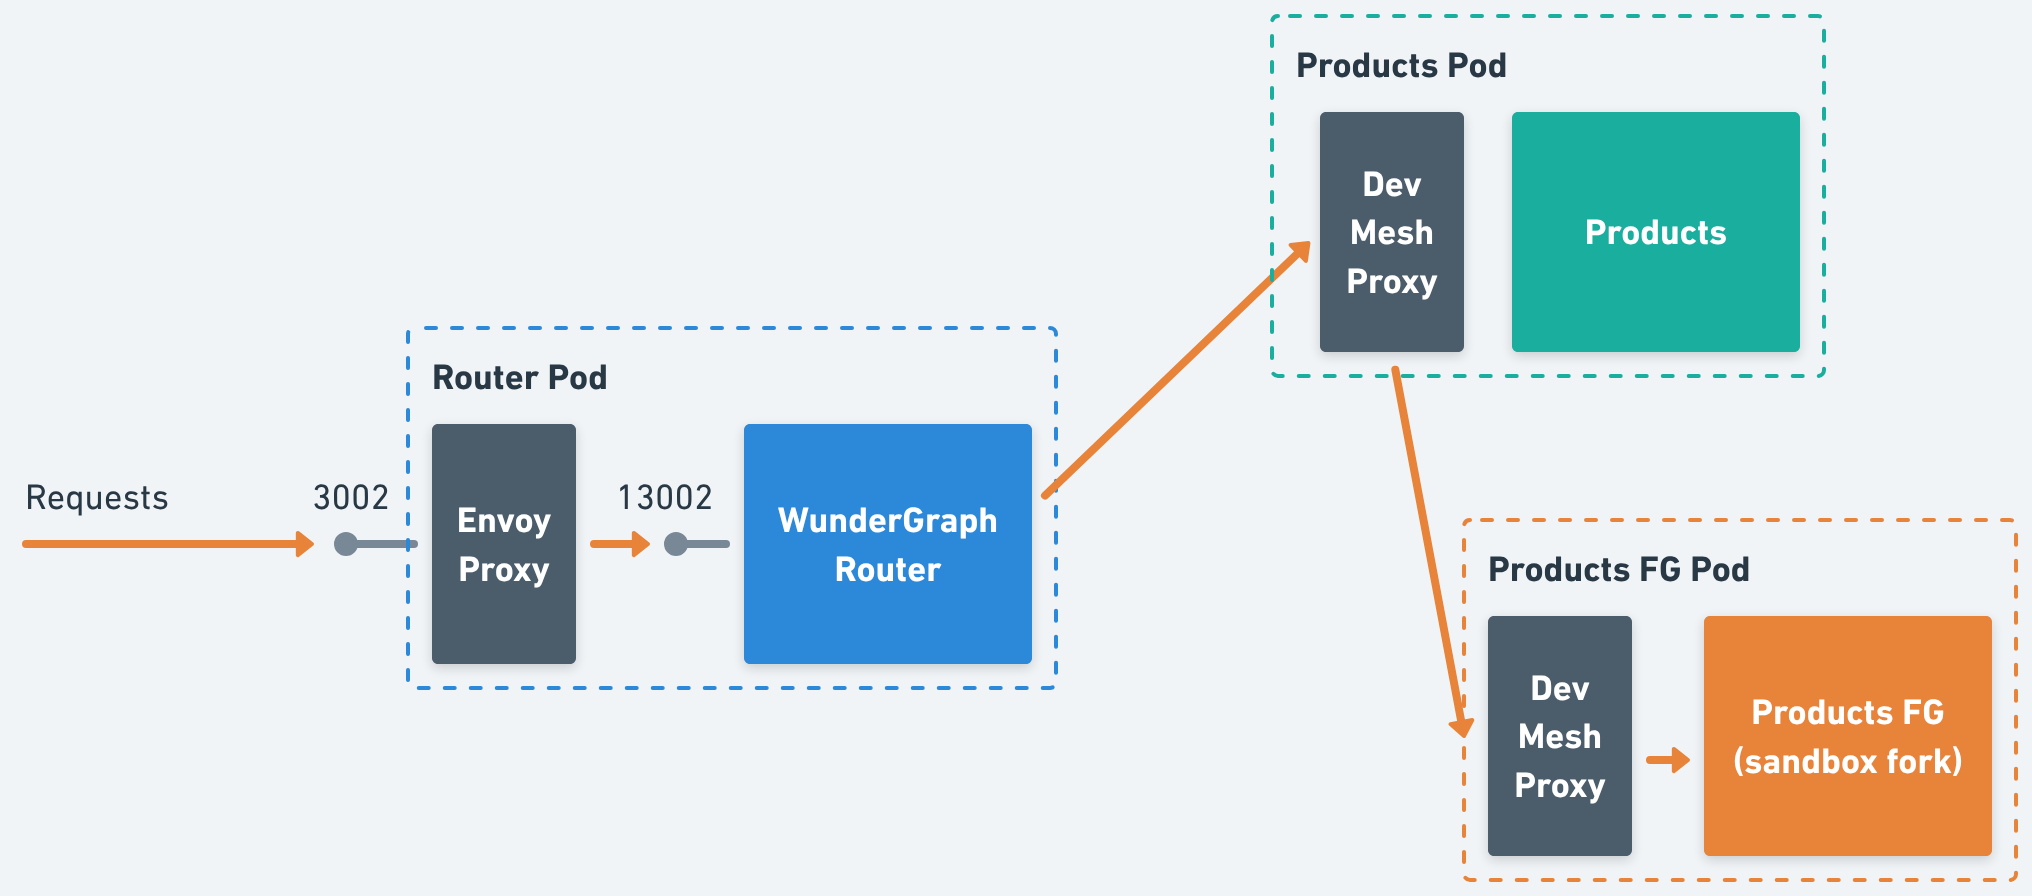
Therefore, the request flow works as shown in the diagram below:
1. A client request arrives at the Envoy proxy (inside the Router Pod) on port 3002.
2. The proxy translates the sd-routing-key (found in the Baggage header) into the X-Feature-Flag header, then forwards the request to the WunderGraph Router (port 13002).
3. The WunderGraph Router loads the updated schema (enabled by the feature flag).
4. To resolve the query, it sends a request to the configured routing endpoint, which points to the original service URL.
5. Because the request includes the Signadot routing key, the DevMesh Proxy forwards it to the forked service (Products FG), where the experimental schema changes are available.
In an ideal scenario, we could eliminate the translation proxy in front of the Router.Since Signadot supports sandbox routing using custom headers, if the underlying system were able to propagate the X-Feature-Flag header directly, we could configure it as a custom routing header in the Signadot Operator. In that case, all routing logic could run entirely off X-Feature-Flag, removing the need for an extra proxy layer.
Another option is to extend or fork the WunderGraph Router (which is open source) to add support for custom headers. This would allow the Router to read the feature flag directly from the Baggage header, avoiding the translation step altogether.
By combining WunderGraph feature flags with Signadot Sandboxes, you can introduce and validate schema changes in a safe, isolated environment without disrupting basline traffic.
This approach provides a clean workflow for experimenting with new fields or subgraphs, testing them end-to-end, and rolling them out with confidence.
While the current setup relies on a lightweight proxy to translate routing keys into feature-flag headers, future improvements could simplify the architecture even further.
Adopting this pattern helps teams move faster while maintaining reliability, making it a practical strategy for evolving federated GraphQL schemas in modern Kubernetes environments.
Get the latest updates from Signadot

