Closed-Loop Verification with Cursor and Signadot
- Signadot CLI v1.4.0+: Required for MCP support. Run
signadot --versionto check. - Go 1.21+: The demo application (HotROD) requires
log/slog. Build will fail on older versions. - Kubernetes Cluster: You can use any cluster (EKS, GKE, Kind), but this tutorial uses Minikube.
- Signadot Account: An active account at signadot.com.
- Cursor IDE: Cursor installed with MCP support enabled.
- Node.js with
npx: Used to install Agent Skills (npx skills add …).
Overview
Testing local microservice changes against a shared Kubernetes cluster often involves a mess of kubectl port-forward commands, brittle mocks, or waiting for CI/CD pipelines just to verify a one-line change.
In this tutorial, we will establish a workflow for local debugging using Signadot and Cursor (the AI IDE) with two complementary integrations: Signadot MCP, which lets the agent discover clusters, workloads, and sandboxes through the Signadot control plane, and the signadot-validate skill, which drives a repeatable validation loop against real cluster dependencies. You can instruct Cursor's agent to spin up a sandbox that routes traffic from a shared cluster to your local machine, all via natural language.
Read more in Introducing the signadot-validate Skill.

Baseline Setup (HotROD)
First, we establish the baseline environment. We will use the "HotROD" demo application.
Start the Cluster & Install Operator
Start your local cluster and install the Signadot Operator.
- Minikube
- Other Clusters
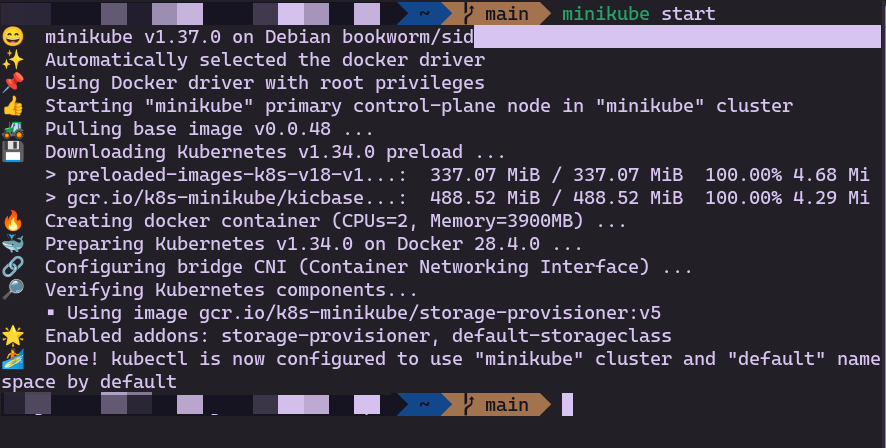
minikube start
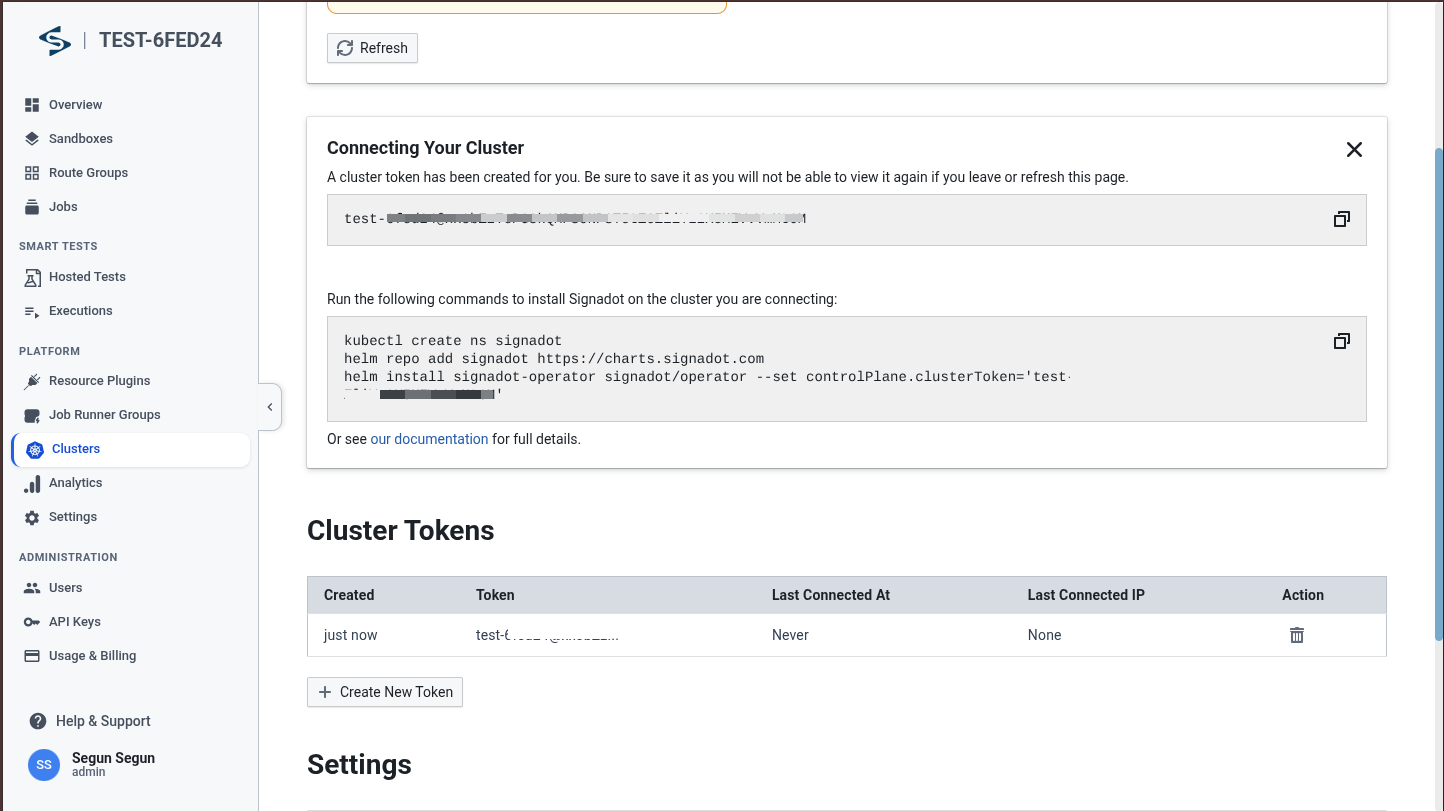
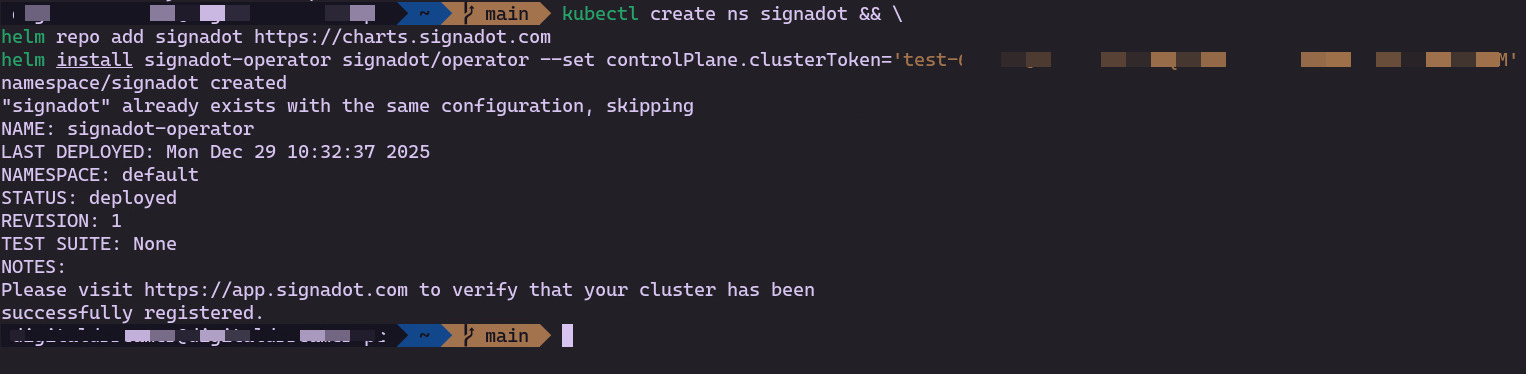
Follow the install instructions found in your Signadot Dashboard under Clusters → Connect. The dashboard will show you the commands to run:
After running the commands, you should see success in your terminal:
Ensure your kubectl context is set to your target cluster:
kubectl config get-contexts  # List available contexts
kubectl config use-context <your-cluster-context>  # Switch to your cluster
Follow the install instructions found in your Signadot Dashboard under Clusters → Connect. The dashboard will show you the commands to run:
After running the commands, you should see success in your terminal:
Install the HotROD Baseline
Deploy the demo microservices into the hotrod namespace.
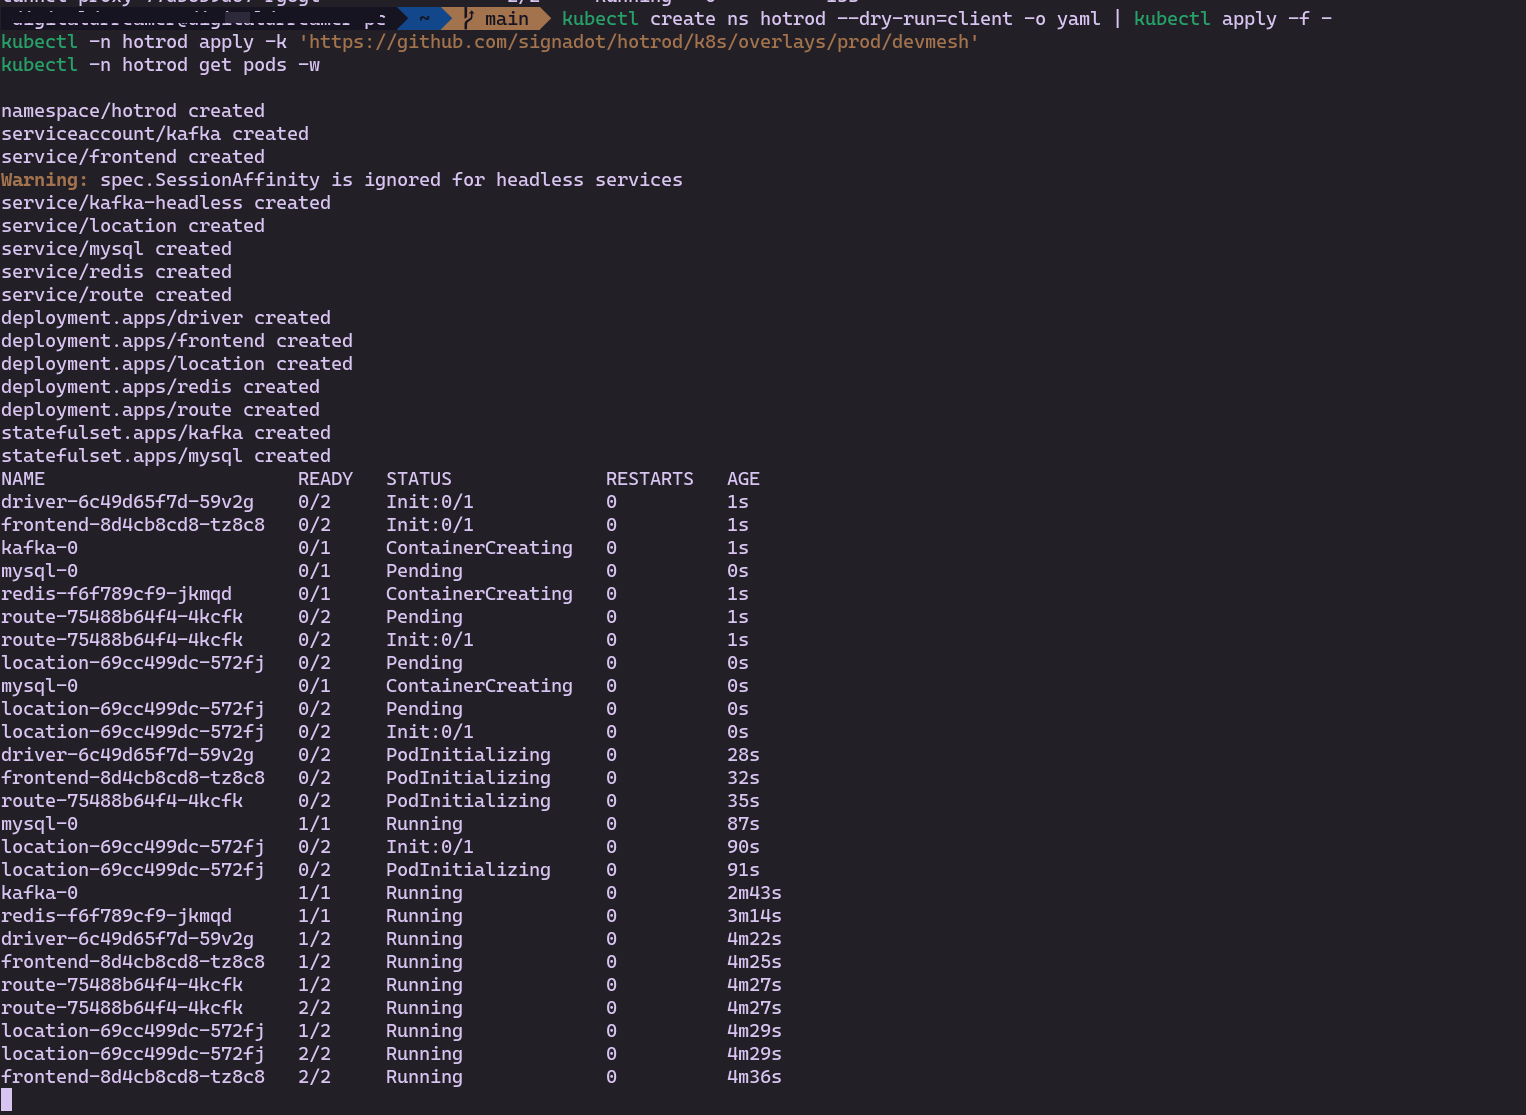
kubectl create ns hotrod || true
kubectl -n hotrod apply -k 'https://github.com/signadot/hotrod/k8s/overlays/prod/devmesh'
Verify that the baseline pods are running. Application deployments should show the DevMesh sidecar (hotrod and sd-sidecar, ready 2/2):
kubectl -n hotrod get pods -o custom-columns=NAME:.metadata.name,READY:.status.containerStatuses[*].ready,CONTAINERS:.spec.containers[*].name
If pods are only 1/1, ask Cursor to restart the affected deployments so the Signadot mutating webhook can inject sidecars. Without sd-sidecar, sandbox routing to your local machine will not work.
Step 1: Local Connect (Required)
To route traffic from the cluster to your laptop, we use signadot local connect. This step must be completed and running before proceeding to Step 3.
Create or edit your config file at ~/.signadot/config.yaml:
local:
  # Use a benchmarking CIDR to avoid conflicts with home/office Wi-Fi
  virtualIPNet: 198.18.0.1/16
  connections:
    - cluster: hotrod-test
      # Force PortForward for stability on Minikube
      type: PortForward
      kubeContext: minikube
Confirm your cluster is registered by running signadot cluster list and checking for hotrod-test. The cluster value in ~/.signadot/config.yaml and in --cluster flags must match the name shown there.
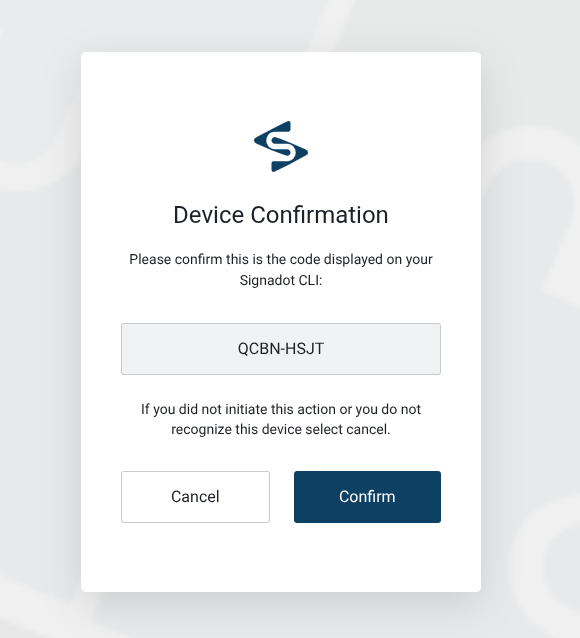
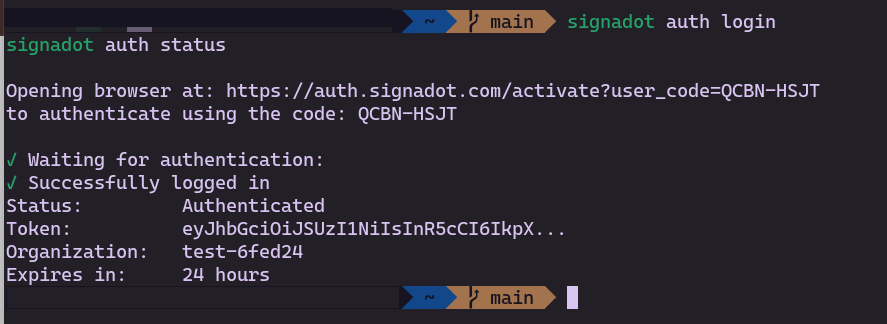
Authenticate your CLI:
signadot auth login
The CLI will open your browser for authentication. You'll see a waiting state in the terminal:

Complete the authentication in your browser:
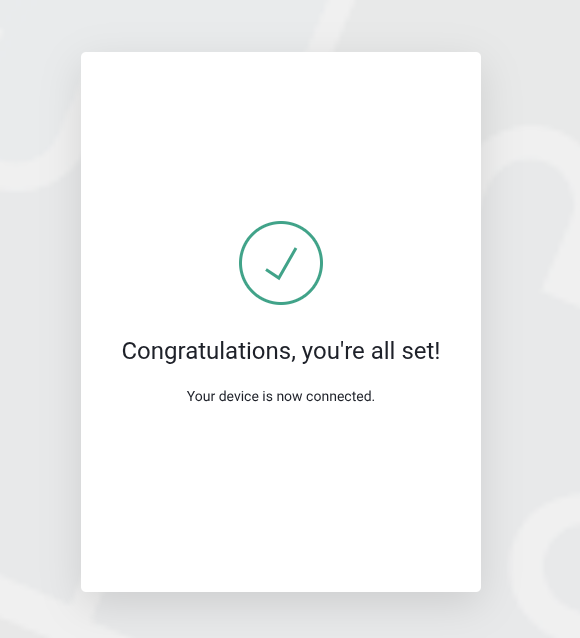
Once authentication completes in the browser, the CLI receives the callback and shows success:
Connect to the Cluster
Run this command as your normal user (do not use sudo):
signadot local connect --cluster hotrod-test
The process will run in the background. You'll be prompted for your password when it needs to update /etc/hosts.
Gate Check: Verify Routing
Before proceeding to Step 3, we must prove the tunnel is working. If this check fails, the sandbox will not work.
Run this in your terminal:
curl -I http://frontend.hotrod.svc:8080
-
HTTP 200 OK: ✅ Proceed to Step 3.
-
Hang/Timeout: ❌ Stop. This may be due to a
virtualIPNetCIDR conflict with your VPN or network configuration. See advanced configuration options to adjust your network settings.
The signadot local connect process must remain running for the duration of your debugging session. Do not interrupt the process.
Step 2: signadot-validate and Cursor MCP
Install the signadot-validate skill to enable repeatable validation against real cluster dependencies, and bridge Cursor to the Signadot CLI so the AI Agent can control Signadot.
Install the signadot-validate skill
From any directory, install the skill into Cursor globally so it is available in any project you open:
Confirm installation:
You should see signadot-validate listed for Cursor.
The skill is stored at ~/.agents/skills/signadot-validate, which is the canonical location. The copy → Cursor step in the install output above makes it available to Cursor's agent from there.
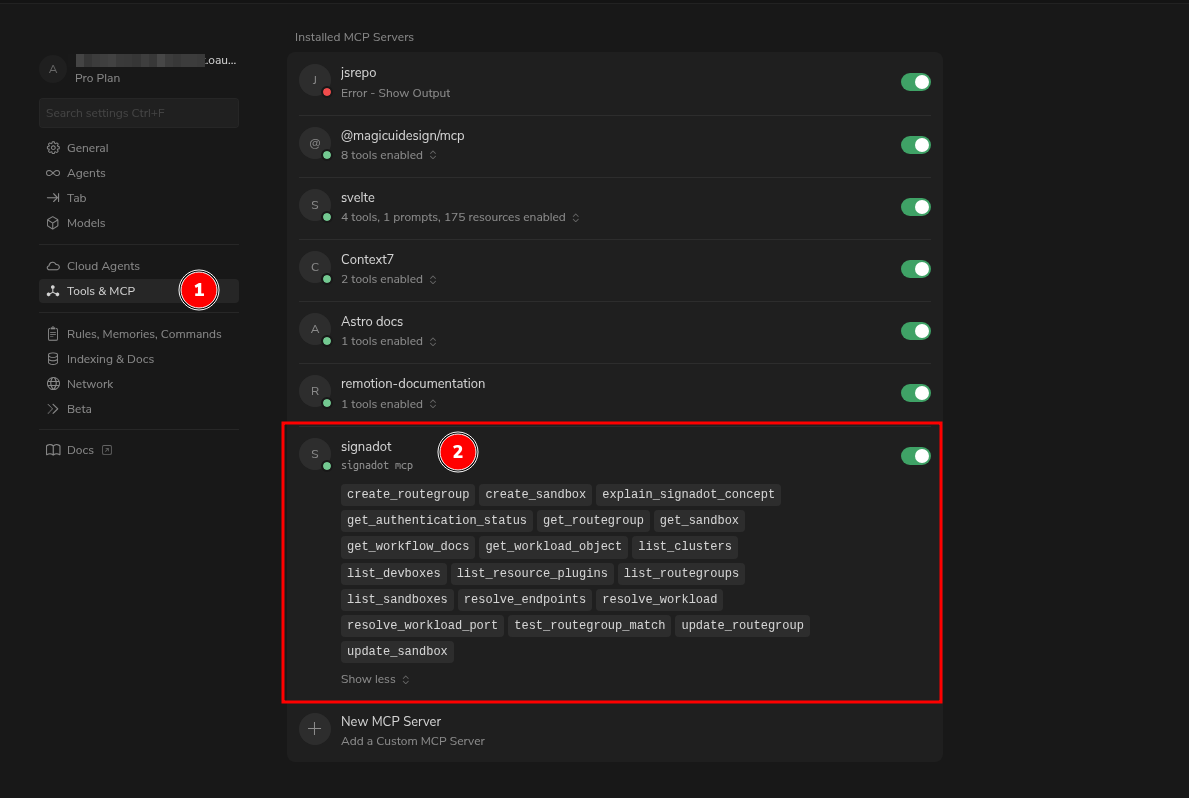
Install Cursor MCP
- Click the button below to automatically install the Signadot MCP server in Cursor:
Alternatively, you can visit the Signadot MCP Cursor documentation page.
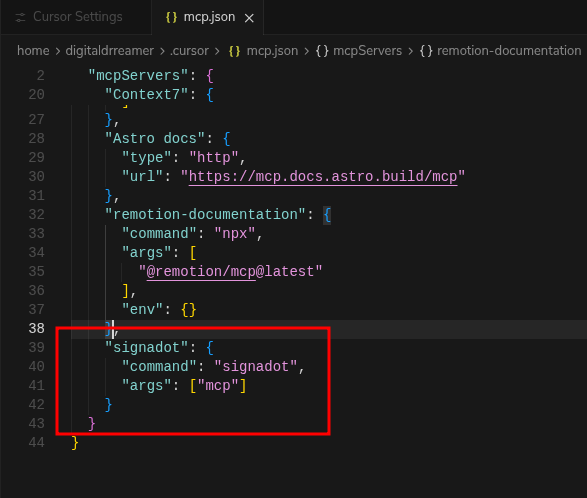
- Fallback: If the link doesn't work, manually edit
~/.cursor/mcp.json:
{
  "mcpServers": {
    "signadot": {
      "command": "signadot",
      "args": ["mcp"]
    }
  }
}
Verify the installation in Cursor Settings > Features > MCP.
For detailed setup instructions, see the Signadot MCP Cursor guide.
Step 3: The Workflow
Ensure Step 1 (Local Connect) is running and healthy before starting this workflow. The signadot local connect process must be running in the background.
We will now use Cursor to drive the infrastructure.
-
Open the HotROD repository in Cursor:
git clone https://github.com/signadot/hotrod -
Open Cursor Chat (
Cmd+LorCtrl+L).
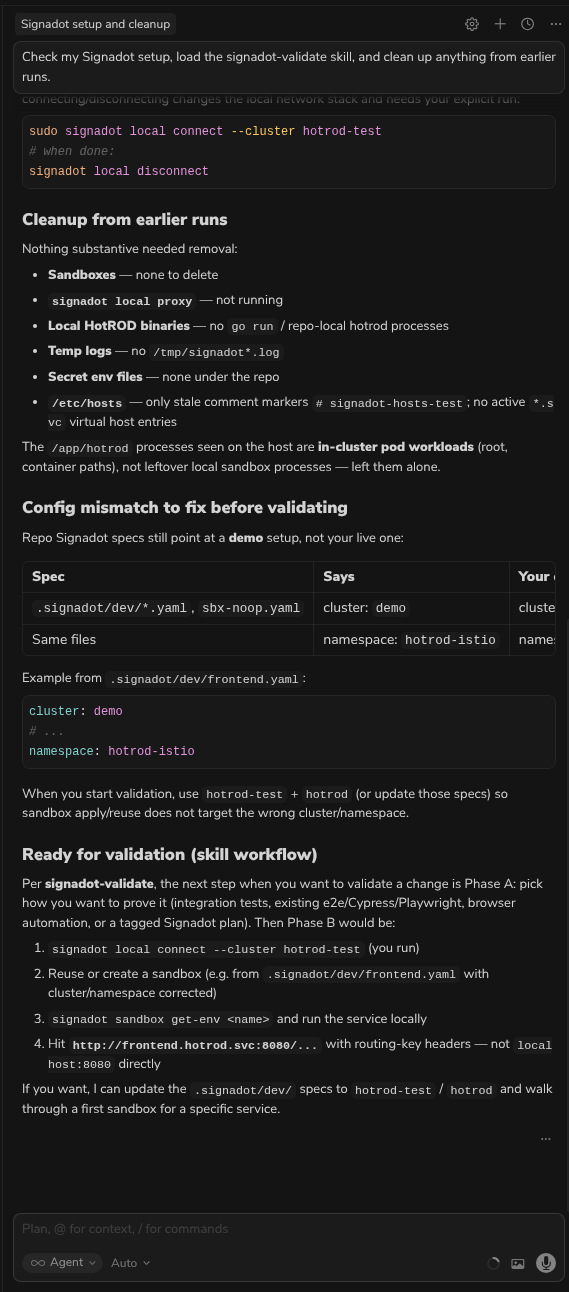
Prompt 1: Sanity & Cleanup
We want a clean slate to avoid state conflicts from previous sessions.
Prompt:
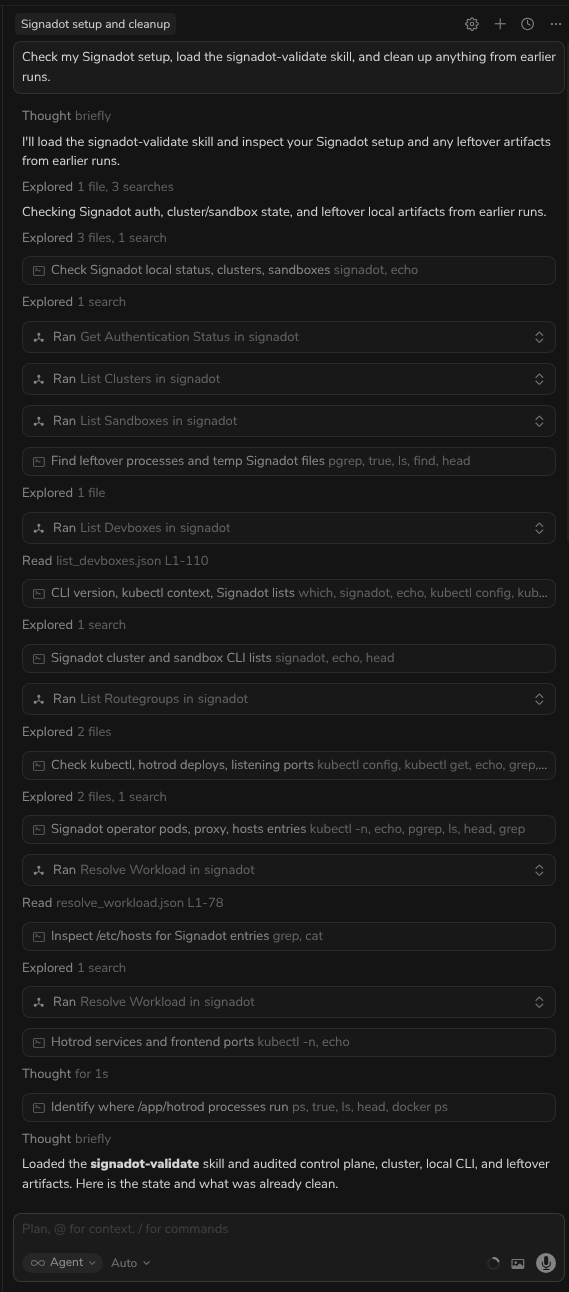
Check my Signadot setup, load the signadot-validate skill, and clean up anything from earlier runs.
Paste the prompt into Cursor Chat and send it. Cursor will use Signadot MCP tools to inspect your cluster, sandboxes, and devbox state.
Prompt 2: Run & Verify
Use the signadot-validate skill to create the sandbox, start the route service locally, and validate the HotROD application end-to-end. The skill handles sandbox creation automatically, so no separate step is required.
Prompt:
Follow the signadot-validate skill to debug the route service: create or reuse a local-dev sandbox called local-route-dev that maps hotrod/route (Deployment) port 8083 to localhost:8083, start the route service locally with the sandbox environment, then verify the HotROD application works correctly by confirming the driver is dispatched as expected via the cluster mesh.
Paste the prompt into Cursor Chat and send it.
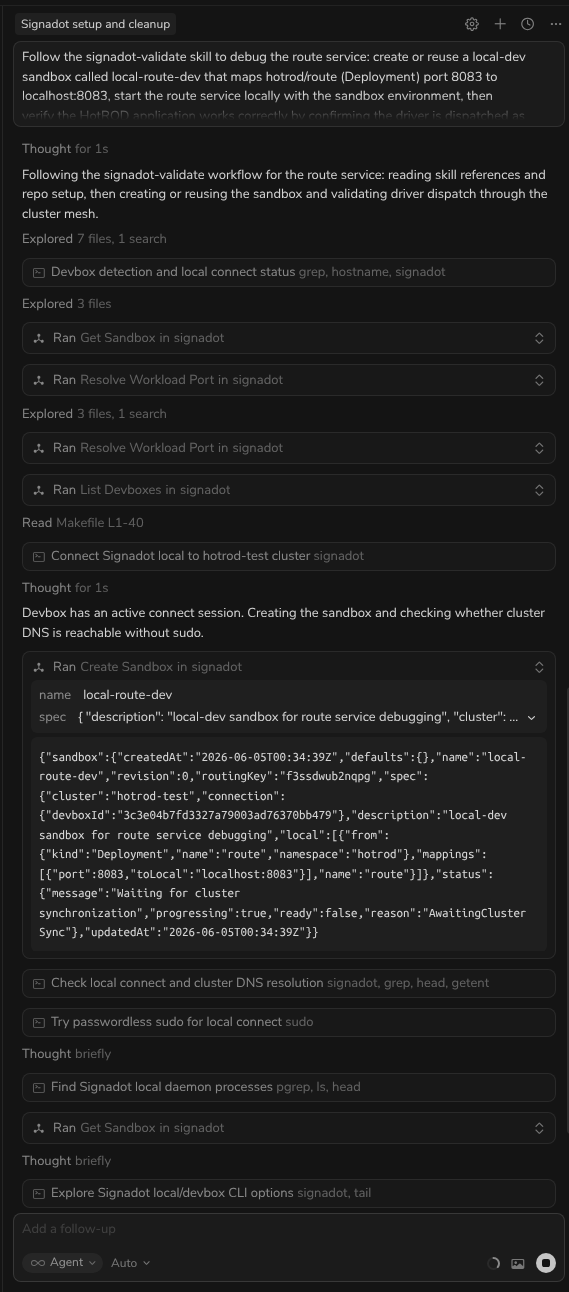
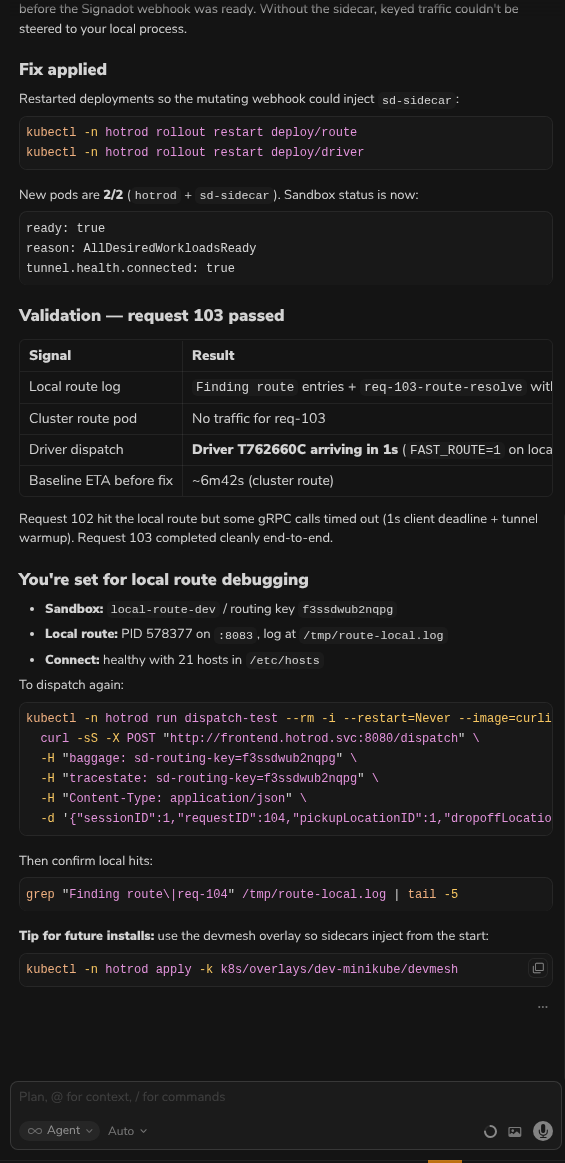
Cursor will coordinate with the signadot-validate skill to run the full validation. You will see:
-
A sandbox spec generated and applied (the skill handles this automatically).
-
eval $(signadot sandbox get-env ...)to inject the cluster context into your shell. This requires Step 1 (signadot local connect) to be running. -
go run ./cmd/hotrod/main.go route(or equivalent) to start your local service. -
A
grpcurlcommand againstroute.hotrod.svc:8083withbaggageandtracestaterouting headers to prove keyed traffic reaches your local process, notlocalhost.
Step 4: Verification
To prove the setup works, change the route service logic and see a different result on the next keyed request.
-
Modify code: Open
services/route/server.goand change the ETA calculation inFindRoute(for example, return a fixed short duration instead of the random minute-scale value). Save the file. -
Restart the local route process so the change is picked up (stop the previous
go runor binary, then start it again with the same sandbox env). -
Verify: Send a keyed request through the cluster URL and confirm the response reflects your change.
Option A: The Header Method (Programmatic)
Since the route service uses gRPC, use grpcurl (not curl) against the cluster service URL. Inject the sandbox routing key in both baggage and tracestate. That is what Signadot and the HotROD mesh expect.
Replace <YOUR_KEY> with the routing key from signadot sandbox get local-route-dev -o yaml:
grpcurl -plaintext \
  -H 'baggage: sd-routing-key=<YOUR_KEY>' \
  -H 'tracestate: sd-routing-key=<YOUR_KEY>' \
  -d '{"from": "37.7749,-122.4194", "to": "37.7849,-122.4094"}' \
  route.hotrod.svc:8083 \
  route.RoutesService/FindRoute
You should see a response that matches your local code change (for example, a much smaller etaSeconds value), proving keyed traffic hit your laptop, not the in-cluster baseline pod.
To confirm routing before editing code, you can start the local route with FAST_ROUTE=1 in the environment. Keyed grpcurl calls should then return "etaSeconds": 1 while unkeyed calls still return longer baseline ETAs.
Option B: Browser Extension (Visual)
If you prefer a UI flow:
-
Install the Signadot Chrome Extension.
-
Log in and select your sandbox (
local-route-dev) from the dropdown. -
Visit
http://frontend.hotrod.svc:8080. The extension will automatically inject the routing headers.
Troubleshooting
If you get stuck, check these common issues we identified during testing:
Connection Timed Out on .svc addresses
If curl http://frontend.hotrod.svc:8080 hangs or .svc resolves to an IP but times out, your machine is likely routing the default virtual IP range to your internet gateway. This is more common with Minikube when using VPNs or office Wi-Fi.
Fix: Edit ~/.signadot/config.yaml and change virtualIPNet to 198.18.0.1/16, then restart local connect.
Authentication Failed / Keyring Errors
If you see "Failed to unlock correct collection" or "No authentication found", you likely ran sudo signadot local connect.
Fix: Run signadot local connect as your normal user. Only provide the sudo password when the CLI prompts you for it.
Go Build Failures
If go run fails with package log/slog is not in GOROOT, your Go version is too old.
Fix: Install Go 1.21 or higher and ensure your $PATH lists the new Go version first.
Local connect is healthy but my local service gets no traffic
signadot local status shows the sandbox mapped, but your local process logs stay empty and grpcurl returns baseline-like results.
Check:
-
signadot local statuslists your sandbox withconnection ready. -
signadot sandbox get <name> -o yamlshowstunnel.health.connected: true. If you seeRoutingNotReadyorDevMesh Sidecar absent, sidecars are missing on the baseline workload. -
HotROD app pods are
2/2with containershotrod,sd-sidecar. If they are1/1, prompt Cursor:DevMesh sidecars are not injected on hotrod deployments. Fix routing readiness for my local sandbox. -
Your local service is listening on the mapped port (for this tutorial,
8083). -
You are calling the cluster URL (
route.hotrod.svc:8083) with both routing headers, notlocalhost.
Conclusion
In this tutorial, you have successfully replaced a complex workflow of YAML editing, port-forwarding, and manual config injection with a streamlined setup and natural language prompts. You learned how to:
-
Configure and connect to the cluster with stable PortForwarding configuration.
-
Install the
signadot-validateskill to give Cursor's agent a repeatable validation loop against real cluster dependencies. -
Clean the environment using Cursor's AI agent.
-
Create a routing sandbox that maps cluster services to your local machine.
-
Inject cluster context into your local process and validate via the cluster mesh.
This workflow enables rapid iteration on microservice changes without the overhead of traditional port-forwarding or waiting for CI/CD pipelines.